- No products in the cart.














Darbuka for Beginners: First Rhythms Made Simple

19
Sep
Updated on: 2026-09-06
Learning darbuka for beginners becomes straightforward when you build the right basics: posture, hand placement, and a consistent practice plan. This guide explains what to look for in an entry-level drum, how to tune and maintain it, and how to develop clean tones without relying on guesswork. You will also find practical exercises for common rhythms, plus a clear comparison of typical drum types. By following the recommendations, you can progress from first strikes to controlled patterns with confidence.
Table of Contents
- 1. Basics of darbuka for beginners
- 2. Choose your first darbuka
- 3. Posture and hand technique
- 4. Starter rhythms to practice
- 5. Common challenges
- 6. Comparison of popular darbuka styles
- 7. Maintenance and care
- 8. Summary & recommendations
1. Basics of darbuka for beginners
The darbuka is a goblet-shaped hand drum used across many Middle Eastern and Mediterranean musical traditions. For most learners, the fastest path to progress is to treat it as an instrument of controlled sound: each strike has a purpose, each tone has a name, and each practice session should build repeatable technique.
When learning darbuka for beginners, your goal is not instant speed. Your goal is reliable articulation. You want a consistent touch, a steady rhythm grid, and the ability to switch between tones such as the bass-like low sound and the sharper higher accents. This is achieved through fundamentals that remain the same across most drum types.
Many new players also benefit from learning how the drum’s surface responds. The head reacts differently near the center than near the rim. This means your hand position affects timbre. Once you understand that relationship, you can produce clearer patterns with less effort.

Hands position: center versus rim strike zones
2. Choose your first darbuka
A correct first purchase reduces frustration. For beginners, the main factors are comfort, head responsiveness, tuning stability, and build quality. Size affects reach and balance. Tuning method affects how often you must adjust pitch. Material affects weight and sustain. None of these factors alone determines success, but together they shape your learning experience.
Size and playing feel. If you have a smaller frame or prefer seated practice, a compact drum can be more comfortable. If you want a wider sound range and easier reach for two-hand technique, a larger format may help. Choose based on how quickly you can place your hands consistently.
Head and tuning access. Look for a drum that provides a stable head and accessible tuning. Beginners often learn fastest when the drum stays in tune while they develop muscle memory. Clay-based or other traditional head materials can offer a distinct response, but they still require basic care.
Build material and durability. Metal and composite bodies can be resilient and consistent. Regardless of body type, check for smooth edges where your palm and fingers naturally rest. Sharp or uneven surfaces can interrupt technique and create unwanted friction.
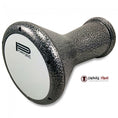
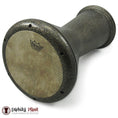
If you want a curated starting point, explore options in the classic size collection and compare sizes side by side. If your priority is a distinctive resonance, review the clay darbuka selection and focus on what head response and tuning access are like in practice.
3. Posture and hand technique
Technique is where progress becomes measurable. The best approach is to use a posture that supports relaxed control. Tension may sound productive early on, but it usually limits speed, accuracy, and endurance.
Seated or standing position
For seated practice, place the drum at a comfortable angle so you can strike the center and the rim without twisting your wrist. Many players angle the drum slightly toward the dominant hand. Standing practice requires the same idea: keep your forearm aligned so the fingers and palm move with the arm rather than fighting it.
Grip philosophy
Unlike percussion sticks, the darbuka is played with fingertip and palm accents. Use a light, controlled touch. Your hand does not need to slam. It needs to land with intention. A relaxed grip also helps you alternate between tones cleanly.
Core strokes
At a beginner level, you will focus on three practical stroke types: a low resonant sound, a higher crisp sound near the rim, and a controlled accent produced by quick finger placement. Even if names differ between regions, the mechanics are consistent. Learn to produce each sound with the same motion every time.
- Low tone: Aim closer to the center. Let the palm contact briefly and release naturally.
- High tone: Move closer to the rim. Use fingertips with less palm involvement.
- Accent tone: Use quick finger placement with a clean lift to avoid muddiness.
Tempo training
Tempo is learned by subdividing. Practice with a slow metronome or a steady internal pulse. Count in groups so that your strikes land in the same rhythmic grid. If your timing is unstable at low tempo, raising speed will not solve it. Fix timing first, then increase speed.
4. Starter rhythms to practice
Rhythm training should feel structured, not random. The best beginner rhythms share a simple pulse and repeatable patterns. Start with shorter loops and add complexity only after accuracy becomes stable.
Exercise 1: Two-tone pulse
Use a repeating pattern that alternates a low tone and a higher tone. Keep your volume consistent. The purpose is to develop even spacing and clean transitions. Record yourself once per week. Listening back helps you hear uneven accents.
Exercise 2: Call-and-response feel
Play a short phrase and then repeat it exactly. If you are learning with a teacher or a companion, ask them to play a complementary phrase, and then mirror it. This approach trains listening and timing. It also reduces the tendency to guess when to strike.
Exercise 3: Add one accent
Once your pulse is steady, insert one extra accent into a repeat cycle. Keep the accent placement fixed. Many beginners rush this step and create timing drift. If the accent lands late, slow down and focus on the hand lift timing, not only the strike.

Rhythm mapping: repeated beats across a grid
5. Common challenges
Most difficulties in darbuka for beginners are predictable. The key is to recognize the cause quickly and adjust technique or practice design. Below are common issues and practical remedies.
Challenge 1: Sounds are inconsistent
Inconsistent sound usually comes from changing hand height, striking position, or contact pressure. Remedy by standardizing your motion. Mark a consistent reference point for center and rim. Practice slowly, repeating the same pattern with identical hand mechanics. If your instrument is unstable or out of tune, tuning adjustment can also improve consistency.
Challenge 2: Timing drift at faster tempos
When you speed up, your body often compresses the rhythm. This creates late or early accents. Remedy by practicing with subdivision. Count each beat and place strikes on the same subdivisions every time. A slightly slower tempo with correct placement is always better than a faster tempo with drift.
Challenge 3: Muddy tone and lack of clarity
Muddiness can result from excessive palm contact, delayed finger release, or striking too close together without lifting. Remedy by reducing force and increasing release speed. Use the high tone near the rim and lift fingers quickly after contact. Clarity improves when your contact is brief and controlled.
Challenge 4: Limited endurance and hand fatigue
Beginners often tense their shoulders and arms, which limits endurance. Remedy by relaxing your posture and using smaller movements. Focus on fingertip control for accents and avoid lifting the entire hand excessively. Also practice in shorter sets with rest periods. Quality practice is better than long sessions with form breakdown.
6. Comparison of popular darbuka styles
Different darbuka styles can produce different attack and resonance. Choosing based on sound preference helps you stay motivated. The comparison below focuses on practical beginner considerations.
| Style | Strengths for beginners | Potential trade-offs |
|---|---|---|
| Classic size | Comfortable reach, balanced sound, easy to fit into basic practice routines | Some players may want more projection for ensemble settings |
| Larger formats | More resonance and sustain, helpful for hearing low-tone character | Requires stable posture and consistent hand placement |
| Clay-based response | Distinct articulation and traditional feel, encourages careful listening | May require attentive maintenance to preserve tone |
For many first-time learners, the best choice is the drum that feels stable in your hands and stays in tune long enough for you to train technique. If you are unsure, prioritize playability and head responsiveness. You can then refine your sound preferences over time.
To match your learning stage with compatible accessories, consider a drum case from darbuka and dumbek cases to protect tuning and head condition during transport.
7. Maintenance and care
Maintenance is not optional for rhythm consistency. Even small changes in humidity, handling, and storage can affect tone. A simple routine helps your darbuka remain reliable.
Keep the head condition stable
Avoid exposing the drum to direct heat or rapid humidity changes. When you finish a practice session, do not store the drum immediately while it is still warm from warm environments. Let it reach room conditions first. This reduces sudden head tension shifts.
Cleaning and contact control
Wipe the drum head gently after playing. Sweat and skin oils can build up over time and affect stickiness and tone response. Use a soft, clean cloth and avoid aggressive scrubbing.
Tuning: focus on gradual changes
When tuning adjustments are needed, make changes gradually. The goal is to correct pitch without causing uneven tension. If your drum includes tuning access points, adjust them in small increments and re-check tone after each step.
Use the right consumables for longevity
If a head replacement becomes necessary, replace with a compatible skin head so your technique remains consistent. You can view options in darbuka skin heads to understand what types are available for your drum category.
8. Summary & recommendations
Darbuka for beginners progresses fastest when learning is guided by fundamentals, not randomness. Start with posture that supports relaxed technique, then focus on consistent strike placement for low and high tones. Practice short rhythm loops, train timing with subdivision, and address clarity problems by improving release speed and contact control. Over time, you will hear improvement immediately, especially in how clean your accents sound.
For your first training cycle, choose a comfortable drum, protect the head condition, and commit to small daily sessions. If you want a simple next step, review entry-friendly drum collections, compare tuning access, and select the option that helps you maintain consistent tone while you build your foundational rhythms.
Q&A
What is the best practice routine for darbuka for beginners?
A practical routine is short and consistent: 5 to 10 minutes of technique drills for low and high tones, 10 minutes of rhythm loops at a slow tempo, and 5 minutes of clarity work by repeating one small pattern. Keep the tempo low enough that your timing remains stable. Once accuracy improves, gradually increase speed while preserving clean tone.
How do I know whether my hand placement is correct?
Correct placement produces repeatable sounds: the low tone should be fuller near the center, and the high tone should be crisp closer to the rim. If the same rhythm sounds different each time, reset your reference points and practice slowly with consistent hand height and contact time. Recording your sessions helps you detect uneven strike positions.
Do I need a metronome to learn rhythms?
A metronome is highly useful, but it is not mandatory. The essential requirement is a stable pulse. If you do not use a metronome, use a steady beat source such as clapping, counting, or rhythmic accompaniment. In both cases, subdivision training is the key to reducing timing drift.
How often should I tune the darbuka?
Tuning frequency depends on storage conditions, handling, and head material response. Many beginners only tune when the drum noticeably loses pitch or when tone becomes uneven. If you live in a region with frequent humidity changes, check tone periodically and make gradual adjustments only when needed.
What should I do next after learning basic strokes?
After you can produce clean low and high tones, focus on rhythm expansion. Add accents carefully, then combine two short phrases into a longer loop. This method builds musical flow without overloading your technique. When you can play a loop with stable timing, your next step is to practice with different tempos to strengthen control.
About the Author
Darbukaplanet contributes practical guidance for hand drum learners, with expertise in instrument selection, rhythm fundamentals, and accessory care. The team focuses on clear, technique-first education so beginners can build confidence quickly and steadily. You can explore related learning resources through the store’s product categories at Darbukaplanet. Thank you for reading and enjoy your learning journey with the darbuka.